Part 1: Run a demo pipeline
In this first part of the Hello nf-core training course, we show you how to find and try out an nf-core pipeline, configure and customize its execution for your needs, and understand how input validation protects against common errors.
We are going to use a pipeline called nf-core/demo that is maintained by the nf-core project as part of its inventory of pipelines for demonstration and training purposes.
Make sure your working directory is set to hello-nf-core/ as instructed on the Getting started page.
1. Find and retrieve the nf-core/demo pipeline
Let's start by locating the nf-core/demo pipeline on the project website at nf-co.re, which centralizes all information such as: general documentation and help articles, documentation for each of the pipelines, blog posts, event announcements and so forth.
1.1. Find the pipeline on the website
In your web browser, go to https://nf-co.re/pipelines/ and type demo in the search bar.
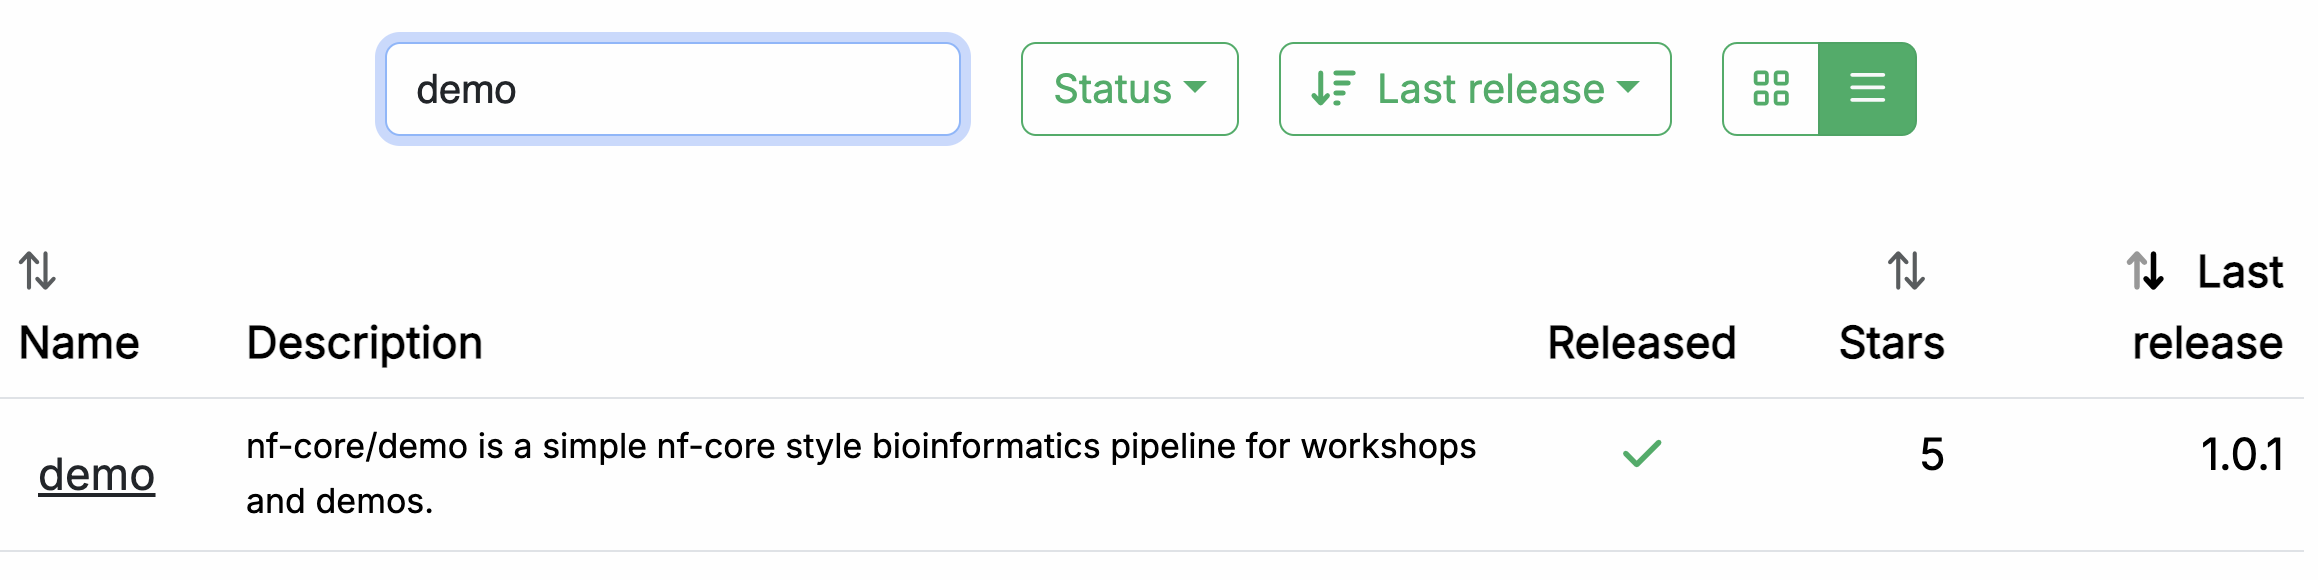
Click on the pipeline name, demo, to access the pipeline documentation page.
Each released pipeline has a dedicated page that includes the following documentation sections:
- Introduction: An introduction and overview of the pipeline
- Usage: Descriptions of how to execute the pipeline
- Parameters: Grouped pipeline parameters with descriptions
- Output: Descriptions and examples of the expected output files
- Results: Example output files generated from the full test dataset
- Releases & Statistics: Pipeline version history and statistics
Whenever you are considering adopting a new pipeline, you should read the pipeline documentation carefully first to understand what it does and how it should be configured before attempting to run it.
Have a look now and see if you can find out:
- Which tools the pipeline will run (Check the tab:
Introduction) - Which inputs and parameters the pipeline accepts or requires (Check the tab:
Parameters) - What are the outputs produced by the pipeline (Check the tab:
Output)
1.1.1. Pipeline overview
The Introduction tab provides an overview of the pipeline, including a visual representation (called a subway map) and a list of tools that are run as part of the pipeline.

- Read QC (FASTQC)
- Adapter and quality trimming (SEQTK_TRIM)
- Present QC for raw reads (MULTIQC)
- Generate a lighthearted text message from a cow (COWPY)
1.1.2. Example command line
The documentation also provides an example input file (discussed further below) and an example command line.
nextflow run nf-core/demo \
  -profile <docker/singularity/.../institute> \
  --input samplesheet.csv \
  --outdir <OUTDIR>
You'll notice that the example command does NOT specify a workflow file, just the reference to the pipeline repository, nf-core/demo.
When invoked this way, Nextflow will assume that the code is organized in a certain way. Let's retrieve the code so we can examine this structure.
1.2. Retrieve the pipeline code
Once we've determined that the pipeline appears to be suitable for our purposes, let's try it out. Fortunately Nextflow makes it easy to retrieve pipelines from correctly-formatted repositories without having to download anything manually.
1.2.1. Use nextflow pull
Let's return to the terminal and run the following:
Command output
Nextflow does a pull of the pipeline code, meaning it downloads the full repository to your local drive.
To be clear, you can do this with any Nextflow pipeline that is appropriately set up in GitHub, not just nf-core pipelines. However nf-core is the largest open-source collection of Nextflow pipelines.
1.2.2. Use nextflow list
You can get Nextflow to give you a list of what pipelines you have retrieved in this way:
You can try pulling a few other pipelines to see how they get listed when you have more than one.
1.2.3. Find where the pipeline was downloaded
You'll notice that the files are not in your current work directory.
By default, Nextflow saves pulled pipelines under $NXF_HOME/assets.
To find where a specific pipeline lives, ask Nextflow directly:
Command output
project name: nf-core/demo
repository  : https://github.com/nf-core/demo
local path  : /workspaces/.nextflow/assets/.repos/nf-core/demo
main script : main.nf
description : An nf-core demo pipeline
revisions   :
  TEMPLATE
  bumper
  dev
  fix-nxfversion
  manually-merge-3_0_2
> master (default)
  nf-core-template-merge-2.13.2.dev0
  nf-core-template-merge-2.14.0
  nf-core-template-merge-2.14.1
  nf-core-template-merge-3.0.0
  nf-core-template-merge-3.0.1
  nf-core-template-merge-3.0.2
  nf-core-template-merge-3.1.0
  nf-core-template-merge-3.1.2
  nf-core-template-merge-3.2.0
  nf-core-template-merge-3.2.1
  nf-core-template-merge-3.3.1
  nf-core-template-merge-3.3.2
  nf-core-template-merge-4.0.0
  1.0.0 [t]
  1.0.1 [t]
  1.0.2 [t]
  1.1.0 [t]
> 1.2.0 [t]
Info
The full path may differ on your system if you're not using our training environment.
Nextflow keeps the downloaded source code intentionally 'out of the way' on the principle that these pipelines should be used more like libraries than code that you would directly interact with.
Under the hood, Nextflow stores each pulled pipeline as a git repository under $NXF_HOME/assets/.repos/, and checks out the code for each revision into a clones/<commit>/ subdirectory.
Because .repos is a hidden directory, a plain tree -L 2 $NXF_HOME/assets/ will look empty.
1.2.4. Create a symlink to access the source code easily
We're not going to look at the code in detail, but let's take a quick peek just to get a sense of what the overall organization looks like.
To make it easier to browse the pipeline source code, create a symbolic link pointing at the checked-out copy of the pipeline:
mkdir -p pipelines/nf-core
ln -s "$(echo $NXF_HOME/assets/.repos/nf-core/demo/clones/*/)" pipelines/nf-core/demo
This creates a shortcut so you can explore the code with tree -L 2 pipelines/nf-core/demo or open files directly.
1.2.5. Overview of the code organization
You can either use tree or use the file explorer to find and open the nf-core/demo directory.
Directory contents
pipelines/nf-core/demo
├── assets
├── CHANGELOG.md
├── CITATIONS.md
├── CODE_OF_CONDUCT.md
├── conf
├── docs
├── LICENSE
├── main.nf
├── modules
├── modules.json
├── nextflow.config
├── nextflow_schema.json
├── nf-test.config
├── README.md
├── ro-crate-metadata.json
├── subworkflows
├── tests
├── tower.yml
└── workflows

7 directories, 12 files
As you can see, there's a lot going on in there, most of which you don't need to worry about.
Briefly, let's note that at the top level, you can find a README file with summary information, as well as accessory files that summarize project information such as licensing, contribution guidelines, citation and code of conduct.
Detailed pipeline documentation is located in the docs directory.
All of this content is used to generate the web pages on the nf-core website programmatically, so they're always up to date with the code.
For the rest, we can distinguish three functional groups of code files:
- Pipeline code components (
main.nf,workflows,subworkflows,modules) - Pipeline configuration
- Pipeline parameters / inputs and validation
We won't go over the pipeline code components in this part of the course, but we will touch on elements of configuration and validation that are likely to be relevant to you as an end user of nf-core pipelines.
Tip
You can also browse any nf-core pipeline's source code on GitHub, e.g. github.com/nf-core/demo. Every nf-core pipeline follows the same directory layout, so once you know the structure, you can find configuration files, modules, and workflows for any pipeline the same way.
For now, on to running the pipeline!
Takeaway
You now know how to find a pipeline via the nf-core website and retrieve a local copy of the source code.
What's next?
Learn how to try out an nf-core pipeline with minimal effort.
2. Try out the pipeline with its test profile
Conveniently, every nf-core pipeline comes with a test profile. This is a minimal set of configuration settings for the pipeline to run using a small test dataset hosted in the nf-core/test-datasets repository. It's a great way to quickly try out a pipeline at small scale.
Tip
Nextflow's configuration profile system allows you to easily switch between different container engines or execution environments. For more details, see Hello Nextflow Part 6: Configuration.
2.1. Examine the test profile
It's good practice to check what a pipeline's test profile specifies before running it.
The test profile for nf-core/demo lives in the configuration file conf/test.config.
You can find it locally inside the pipeline source that nextflow pull downloaded, via the pipelines symlink created in section 1.2.4:
Here is the content of that file:
You'll notice right away that the comment block at the top includes a usage example showing how to run the pipeline with this test profile.
| conf/test.config | |
|---|---|
The only things we need to supply are what's shown between carets in the example command: <docker/singularity> and <OUTDIR>.
As a reminder, <docker/singularity> refers to the choice of container system. All nf-core pipelines are designed to be usable with containers (Docker, Singularity, etc.) to ensure reproducibility and eliminate software installation issues.
So we'll need to specify whether we want to use Docker or Singularity to test the pipeline.
The --outdir <OUTDIR> part refers to the directory where Nextflow will write the pipeline's outputs.
We need to provide a name for it, which we can just make up.
If it does not exist already, Nextflow will create it for us at runtime.
Moving on to the section after the comment block, the test profile shows us what has been pre-configured for testing: most notably, the input parameter is already set to point to a test dataset, so we don't need to provide our own data.
If you follow the link to the pre-configured input, you'll see it is a csv file containing sample identifiers and file paths for several experimental samples.
sample,fastq_1,fastq_2
SAMPLE1_PE,https://raw.githubusercontent.com/nf-core/test-datasets/viralrecon/illumina/amplicon/sample1_R1.fastq.gz,https://raw.githubusercontent.com/nf-core/test-datasets/viralrecon/illumina/amplicon/sample1_R2.fastq.gz
SAMPLE2_PE,https://raw.githubusercontent.com/nf-core/test-datasets/viralrecon/illumina/amplicon/sample2_R1.fastq.gz,https://raw.githubusercontent.com/nf-core/test-datasets/viralrecon/illumina/amplicon/sample2_R2.fastq.gz
SAMPLE3_SE,https://raw.githubusercontent.com/nf-core/test-datasets/viralrecon/illumina/amplicon/sample1_R1.fastq.gz,
SAMPLE3_SE,https://raw.githubusercontent.com/nf-core/test-datasets/viralrecon/illumina/amplicon/sample2_R1.fastq.gz,
This is called a samplesheet, and is the most common form of input to nf-core pipelines. Don't worry if you're not familiar with the data formats and types, it's not important for what follows.
We now have everything we need to try out the pipeline.
2.2. Run the pipeline
As noted above, we can use the example testing command almost as-is; we just need to specify what software packaging to use, and what to name the output directory.
Here we'll use Docker for the container system and demo-results, respectively.
With that, we can run the test command:
Command output
N E X T F L O W   ~  version 26.04.4

Downloading plugin nf-schema@2.7.2
Launching `https://github.com/nf-core/demo` [cranky_curry] revision: 32893afef8 [master]


------------------------------------------------------
                                        ,--./,-.
        ___     __   __   __   ___     /,-._.--~'
  |\ | |__  __ /  ` /  \ |__) |__         }  {
  | \| |       \__, \__/ |  \ |___     \`-._,-`-,
                                        `._,._,'
  nf-core/demo 1.2.0
------------------------------------------------------

Input/output options
  input                     : https://raw.githubusercontent.com/nf-core/test-datasets/viralrecon/samplesheet/samplesheet_test_illumina_amplicon.csv
  outdir                    : demo-results

Institutional config options
  config_profile_name       : Test profile
  config_profile_description: Minimal test dataset to check pipeline function

Generic options
  trace_report_suffix       : 2026-07-03_21-31-35

Core Nextflow options
  revision                  : master
  runName                   : cranky_curry
  containerEngine           : docker
  launchDir                 : /workspaces/training/hello-nf-core
  workDir                   : /workspaces/training/hello-nf-core/work
  projectDir                : /workspaces/.nextflow/assets/.repos/nf-core/demo/clones/32893afef8076a03a2767a020b3f0cab2e0b40b2
  userName                  : root
  profile                   : docker,test
  configFiles               : /workspaces/.nextflow/assets/.repos/nf-core/demo/clones/32893afef8076a03a2767a020b3f0cab2e0b40b2/nextflow.config

!! Only displaying parameters that differ from the pipeline defaults !!
------------------------------------------------------

* The pipeline
    https://doi.org/10.5281/zenodo.12192442

* The nf-core framework
    https://doi.org/10.1038/s41587-020-0439-x

* Software dependencies
    https://github.com/nf-core/demo/blob/master/CITATIONS.md

executor >  local (8)
[ca/5b0f3e] NFCORE_DEMO:DEMO:FASTQC (SAMPLE3_SE)     [100%] 3 of 3 ✔
[b7/cb6812] NFCORE_DEMO:DEMO:SEQTK_TRIM (SAMPLE3_SE) [100%] 3 of 3 ✔
[ff/6ebd98] NFCORE_DEMO:DEMO:COWPY                   [100%] 1 of 1 ✔
[09/bbd1b4] NFCORE_DEMO:DEMO:MULTIQC (demo)          [100%] 1 of 1 ✔
-[nf-core/demo] Pipeline completed successfully-
If your output matches that, congratulations! You've just run your first nf-core pipeline.
You'll notice that there is a lot more console output than when you run a basic Nextflow pipeline. There's a header that includes a summary of the pipeline's version, inputs and outputs, and a few elements of configuration.
Info
Your output will show different timestamps, execution names, and file paths, but the overall structure and process execution should be similar.
Notice the line near the top of the output:
This tells you which revision of the pipeline was used.
Because we did not specify a version, Nextflow used the latest commit on master.
For reproducible runs, you should pin a specific release using the -r flag:
This ensures that the same pipeline code is used every time, regardless of new commits or releases.
For this training we omit -r for simplicity, but in production you should always specify it.
Moving on to the execution output, let's have a look at the lines that tell us what processes were run:
executor >  local (8)
[ca/5b0f3e] NFCORE_DEMO:DEMO:FASTQC (SAMPLE3_SE)     [100%] 3 of 3 ✔
[b7/cb6812] NFCORE_DEMO:DEMO:SEQTK_TRIM (SAMPLE3_SE) [100%] 3 of 3 ✔
[ff/6ebd98] NFCORE_DEMO:DEMO:COWPY                   [100%] 1 of 1 ✔
[09/bbd1b4] NFCORE_DEMO:DEMO:MULTIQC (demo)          [100%] 1 of 1 ✔
-[nf-core/demo] Pipeline completed successfully-
This tells us that four processes were run, corresponding to the four tools shown in the pipeline documentation page on the nf-core website: FASTQC, SEQTK_TRIM, MULTIQC and COWPY.
The full process names as shown here, such as NFCORE_DEMO:DEMO:MULTIQC, are longer than what you may have seen in the introductory Hello Nextflow material.
These include the names of their parent workflows and reflect the modularity of the pipeline code.
We'll go into more detail about that in Part 2 of this course.
2.3. Examine the pipeline's outputs
Finally, let's have a look at the demo-results directory produced by the pipeline.
Directory contents
demo-results
├── cowpy
│   └── cowpy.txt
├── fastqc
│   ├── SAMPLE1_PE
│   ├── SAMPLE2_PE
│   └── SAMPLE3_SE
├── fq
│   ├── SAMPLE1_PE
│   ├── SAMPLE2_PE
│   └── SAMPLE3_SE
├── multiqc
│   ├── multiqc_data
│   └── multiqc_report.html
└── pipeline_info
    ├── execution_report_2026-07-03_21-31-35.html
    ├── execution_timeline_2026-07-03_21-31-35.html
    ├── execution_trace_2026-07-03_21-31-35.txt
    ├── nf_core_demo_software_mqc_versions.yml
    ├── params_2026-07-03_21-31-43.json
    └── pipeline_dag_2026-07-03_21-31-35.html

12 directories, 8 files
That might seem like a lot.
To learn more about the nf-core/demo pipeline's outputs, check out its documentation page.
At this stage, what's important to observe is that the results are organized by module, and there is additionally a directory called pipeline_info containing various timestamped reports about the pipeline execution.
For example, the execution_timeline_* file shows you what processes were run, in what order and how long they took to run:

Info
Here the tasks were not run in parallel because we are running on a minimalist machine in Github Codespaces. To see these run in parallel, try increasing the CPU allocation of your codespace and the resource limits in the test configuration.
These reports are generated automatically for all nf-core pipelines.
Takeaway
You know how to run an nf-core pipeline using its built-in test profile and where to find its outputs.
What's next?
Learn how to configure the pipeline to customize its execution.
3. Configure pipeline execution
As explained in Hello Config, we want to be able to change what data our pipeline will run on and how it will run without changing the pipeline code itself. To that end, Nextflow supports multiple ways of controlling pipeline configuration, which can be a bit overwhelming.
The nf-core project specifies conventions for organizing configuration elements, distinguishing two kinds of configuration at the top level: pipeline parameters and configuration in the strict sense.
- Pipeline parameters (set through the
paramssystem) typically include things like input files, tool behavior flags and analysis parameters. - Configuration in the strict sense refers to the logistics of how the pipeline gets run, i.e. the executor, compute resource allocations and so on.
Let's start by tackling pipeline parameters, then we'll look at configuration in the strict sense.
3.1. Pipeline parameters
For all nf-core pipelines, you can obtain a full list of pipeline parameters directly from the command line by using the --help flag, which is itself a pipeline parameter.
3.1.1. Get the list of parameters with --help
Run the help command for the demo pipeline:
Command output
 N E X T F L O W   ~  version 26.04.4

Launching `https://github.com/nf-core/demo` [adoring_meucci] revision: 32893afef8 [master]


------------------------------------------------------
                                        ,--./,-.
        ___     __   __   __   ___     /,-._.--~'
  |\ | |__  __ /  ` /  \ |__) |__         }  {
  | \| |       \__, \__/ |  \ |___     \`-._,-`-,
                                        `._,._,'
  nf-core/demo 1.2.0
------------------------------------------------------
Typical pipeline command:

  nextflow run nf-core/demo -profile <docker/singularity/.../institute> --input samplesheet.csv --outdir <OUTDIR>

Input/output options
  --input                       [string] Path to a metadata file containing information about the samples in the experiment.
  --outdir                      [string] The output directory where the results will be saved. You have to use absolute paths to storage on Cloud infrastructure.

  --email                       [string] Email address for completion summary.
  --multiqc_title               [string] MultiQC report title. Printed as page header, used for filename if not otherwise specified.

Reference genome options
  --genome                      [string] Name of iGenomes reference.
  --fasta                       [string] Path to FASTA genome file.

Process skipping options
  --skip_trim                   [boolean] Skip trimming fastq files with seqtk

Generic options
  --multiqc_methods_description [string]          Custom MultiQC yaml file containing HTML including a methods description.
  --help                        [boolean, string] Display the help message.
  --help_full                   [boolean]         Display the full detailed help message.
  --show_hidden                 [boolean]         Display hidden parameters in the help message (only works when --help or --help_full are provided).
!! Hiding 19 param(s), use the `--showHidden` parameter to show them !!
------------------------------------------------------

* The pipeline
    https://doi.org/10.5281/zenodo.12192442

* The nf-core framework
    https://doi.org/10.1038/s41587-020-0439-x

* Software dependencies
    https://github.com/nf-core/demo/blob/master/CITATIONS.md
As you can see, the output groups parameters into categories (Input/output options, Reference genome options, etc.) with types and descriptions for each one.
This categorization is determined by a schema file, which is covered further below.
In plain Nextflow pipelines, --help only works if the developer implemented it manually.
Tip
Use --help --show_hidden to see additional parameters that are hidden by default, such as --publish_dir_mode or --monochrome_logs.
3.1.2. Set parameter values
As covered in Hello Config, you can set parameter values on the command line with --param_name or collect a set of parameters in a YAML file and pass it with -params-file.
Both approaches work the same way with nf-core pipelines.
For example, to skip the trimming step, we want to set the boolean parameter skip_trim to true.
A params file called my_params.yml is provided in your working directory with that value already set:
Pass it with -params-file:
nextflow run nf-core/demo -profile docker,test --outdir demo-results-notrim -params-file my_params.yml
Command output
 N E X T F L O W   ~  version 26.04.4

Launching `https://github.com/nf-core/demo` [focused_heisenberg] revision: 32893afef8 [master]


------------------------------------------------------
                                        ,--./,-.
        ___     __   __   __   ___     /,-._.--~'
  |\ | |__  __ /  ` /  \ |__) |__         }  {
  | \| |       \__, \__/ |  \ |___     \`-._,-`-,
                                        `._,._,'
  nf-core/demo 1.2.0
------------------------------------------------------

Input/output options
  input                     : https://raw.githubusercontent.com/nf-core/test-datasets/viralrecon/samplesheet/samplesheet_test_illumina_amplicon.csv
  outdir                    : demo-results-notrim

Process skipping options
  skip_trim                 : true

Institutional config options
  config_profile_name       : Test profile
  config_profile_description: Minimal test dataset to check pipeline function

Generic options
  trace_report_suffix       : 2026-07-03_22-08-47

Core Nextflow options
  revision                  : master
  runName                   : focused_heisenberg
  containerEngine           : docker
  launchDir                 : /workspaces/training/hello-nf-core
  workDir                   : /workspaces/training/hello-nf-core/work
  projectDir                : /workspaces/.nextflow/assets/.repos/nf-core/demo/clones/32893afef8076a03a2767a020b3f0cab2e0b40b2
  userName                  : root
  profile                   : docker,test
  configFiles               : /workspaces/.nextflow/assets/.repos/nf-core/demo/clones/32893afef8076a03a2767a020b3f0cab2e0b40b2/nextflow.config

!! Only displaying parameters that differ from the pipeline defaults !!
------------------------------------------------------

* The pipeline
    https://doi.org/10.5281/zenodo.12192442

* The nf-core framework
    https://doi.org/10.1038/s41587-020-0439-x

* Software dependencies
    https://github.com/nf-core/demo/blob/master/CITATIONS.md

executor >  local (5)
[7a/f3599e] NFCORE_DEMO:DEMO:FASTQC (SAMPLE3_SE) [100%] 3 of 3 ✔
[b0/2f0bdc] NFCORE_DEMO:DEMO:COWPY               [100%] 1 of 1 ✔
[c3/3c2278] NFCORE_DEMO:DEMO:MULTIQC (demo)      [100%] 1 of 1 ✔
-[nf-core/demo] Pipeline completed successfully-
The SEQTK_TRIM process no longer appears in the output.
Important limitations about parameter inputs
Setting boolean parameters on the command line
Starting with Nextflow version 26.04, all values supplied on the command line are typed as strings.
For a boolean parameter like skip_trim, passing it as a bare flag (--skip_trim) or as --skip_trim true is evaluated as the string "true", which fails schema validation:
To set a boolean parameter to a genuine true/false value, use a -params-file as shown above, or set it in a config file.
String, integer and file-path parameters are unaffected and can still be set directly on the command line.
This course uses this pattern throughout for boolean parameters.
Using custom configuration files
Although it is technically possible to set pipeline parameters in a custom configuration file passed with -c, this may not override defaults already set in the pipeline's own nextflow.config, depending on Nextflow's configuration precedence rules.
Using --param_name on the command line or -params-file is more reliable, as these always take precedence.
As a rule of thumb: If it appears in the --help output, set it via the command line or a params file rather than a config file.
3.1.3. Parameter validation
Fun fact: the --help command works for all nf-core pipelines because the nf-core project requires developers to define all pipeline parameters formally in a JSON schema file (nextflow_schema.json).
This schema records each parameter's type, description, default value, and grouping.
In addition to powering the --help output, the schema file also enables automated validation at launch time.
This means that Nextflow can check that every parameter you pass exists and has been given an appropriate value (of appropriate type, within the allowed range of values etc).
We cover this in more detail in Part 5: Input Validation, but you can already see it in action by giving the demo pipeline some invalid parameter input.
3.1.3.1. Unrecognized parameters
Try passing a parameter that does not exist:
The console output includes a warning:
The pipeline still runs, but the warning alerts you right away that --foobar is not a recognized parameter.
This is meant to draw your attention to non-breaking typos, like --outDir being used instead of --outdir, which can help you avoid wasting time and compute.
3.1.3.2. Invalid parameter values
Validation also checks parameter values.
The --skip_trim parameter is a boolean flag, so passing a string value causes the pipeline to fail immediately:
ERROR ~ Validation of pipeline parameters failed!

 -- Check '.nextflow.log' file for details
The following invalid input values have been detected:

* --skip_trim (yes): Value is [string] but should be [boolean]
The pipeline stops before any processes run, saving you from a failed or incorrect execution.
As noted in section 3.1.2, boolean parameters should be set to a genuine true/false value in a params file rather than passed on the command line, since command-line values are typed as strings.
3.1.4. Input validation
The same validation logic can also be used to check the validity of input files. For example, if a pipeline expects a samplesheet as its main data input (which is the case of many if not most nf-core pipelines), the developer can provide an input schema (distinct from the parameters schema) describing how the input file should be structured.
Then, at runtime, Nextflow can check that the input file provided is valid.
We also cover this in more detail in Part 5: Input Validation, but you can already see it in action by giving the demo pipeline an invalid input samplesheet.
The nf-core/demo pipeline expects a CSV file with columns sample, fastq_1, and fastq_2.
This is defined in a schema file (assets/schema_input.json) that specifies the expected structure, column types, and constraints.
Schema file for inputs
{
    "$schema": "https://json-schema.org/draft/2020-12/schema",
    "$id": "https://raw.githubusercontent.com/nf-core/demo/master/assets/schema_input.json",
    "title": "nf-core/demo pipeline - params.input schema",
    "description": "Schema for the file provided with params.input",
    "type": "array",
    "items": {
        "type": "object",
        "properties": {
            "sample": {
                "type": "string",
                "pattern": "^\\S+$",
                "errorMessage": "Sample name must be provided and cannot contain spaces",
                "meta": ["id"]
            },
            "fastq_1": {
                "type": "string",
                "format": "file-path",
                "exists": true,
                "pattern": "^([\\S\\s]*\\/)?[^\\s\\/]+\\.f(ast)?q\\.gz$",
                "errorMessage": "FastQ file for reads 1 must be provided, cannot contain spaces and must have extension '.fq.gz' or '.fastq.gz'"
            },
            "fastq_2": {
                "type": "string",
                "format": "file-path",
                "exists": true,
                "pattern": "^([\\S\\s]*\\/)?[^\\s\\/]+\\.f(ast)?q\\.gz$",
                "errorMessage": "FastQ file for reads 2 cannot contain spaces and must have extension '.fq.gz' or '.fastq.gz'"
            }
        },
        "required": ["sample", "fastq_1"]
    }
}
The schema specifies that sample and fastq_1 are required, while fastq_2 is optional (supporting both paired-end and single-end data).
File paths are validated for existence and extension pattern.
To demonstrate this, we provide a malformed samplesheet called malformed_samplesheet.csv in your working directory:
This samplesheet is missing the required fastq_1 column and has a non-existent file path in fastq_2.
Run the demo pipeline using malformed_samplesheet.csv as the input:
nextflow run nf-core/demo -profile docker,test --outdir demo-results --input malformed_samplesheet.csv
ERROR ~ Validation of pipeline parameters failed!

 -- Check '.nextflow.log' file for details
The following invalid input values have been detected:

* --input (malformed_samplesheet.csv): Validation of file failed:
    -> Entry 1: Error for field 'fastq_2' (/not/a/real/file.fastq.gz): the file or directory
       '/not/a/real/file.fastq.gz' does not exist (FastQ file for reads 2 cannot contain spaces
       and must have extension '.fq.gz' or '.fastq.gz')
    -> Entry 1: Missing required field(s): fastq_1
As you can see, the pipeline fails immediately and reports all validation errors at once. nf-schema does not stop at the first error — it collects every problem and lists them together, so you can fix everything in one go rather than discovering issues one by one.
Each error identifies the exact entry and field that caused the problem, so you can fix your samplesheet then re-launch the pipeline with confidence that it's not going to fail at some later point when Nextflow actually goes to access the file path.
For developers, all of this is covered in more detail in Part 5 of this course.
3.2. Configuration
Configuration in the strict sense controls how the pipeline runs: resource allocation, tool-specific arguments, where jobs execute, and which software packaging system to use.
nf-core pipelines include default configuration in nextflow.config and the conf/ directory.
Before overriding anything, it helps to know where the defaults live.
You already saw in section 2.1 that the pipeline source code lives under $NXF_HOME/assets.
Using the pipelines symlink from section 1.2.4, list the config files to see what's available:
base.config
containers_conda_lock_files_amd64.config
containers_conda_lock_files_arm64.config
containers_docker_amd64.config
containers_docker_arm64.config
containers_singularity_https_amd64.config
containers_singularity_https_arm64.config
containers_singularity_oras_amd64.config
containers_singularity_oras_arm64.config
igenomes.config
igenomes_ignored.config
modules.config
test.config
test_full.config
The most important configuration files are:
conf/base.config: Defines resource labels (process_low,process_medium,process_high) that assign CPUs, memory, and time to processes. When you see a process using more resources than expected, this is where those defaults come from.conf/modules.config: Sets per-process tool arguments (ext.args) and output publishing settings (publishDir). Open this file to see what arguments each tool receives by default.conf/test.config: The test profile you used in section 2.1, which caps resources viaresourceLimitsand sets a test samplesheet. Activated with-profile test. There is also aconf/test_full.configfor running with a full-sized test dataset, useful for benchmarking.
The central nextflow.config loads all of the above and sets the appropriate default values for everything.
If you wish to modify any of the settings specified in these files, do not modify any of them files directly.
Instead, create your own config file and pass it with -c.
The values you specify will override the default values set in those other files.
Let's try this in practice.
3.2.1. Customize process resources and tool arguments
nf-core modules support two common types of configuration override: resource allocation (CPUs, memory, time) and tool arguments via ext.args.
Many command-line tools have arguments that are not commonly enough used to be exposed as pipeline parameters.
The ext.args convention lets you pass these arguments to the underlying tool through a config file instead.
The custom.config file provided in your working directory demonstrates both overrides:
| custom.config | |
|---|---|
The first block overrides FASTQC resource allocation.
By default, FASTQC uses the process_medium label from base.config, which allocates 6 CPUs and 36 GB of memory; here we cap it at 2 CPUs and 4 GB.
The second block passes an extra argument to SEQTK_TRIM via ext.args.
The -b 5 flag tells seqtk trimfq to trim 5 bases from the beginning of each read in addition to quality trimming.
Run the pipeline with this config:
Command output
The -c flag adds your config on top of the pipeline's built-in configuration.
To verify the ext.args override took effect, find the SEQTK_TRIM work directory hash from the run output (e.g. work/17/428668...) and check the .command.sh file inside it:
Command output
You should see -b 5 in the seqtk trimfq command.
One important thing to know about ext.args: if a module already has a default value set, your value will completely replace it rather than append to it.
For example, FASTQC has ext.args = '--quiet' set by default in conf/modules.config:
| conf/modules.config | |
|---|---|
If you set ext.args = '--kmers 8' for FASTQC, the --quiet flag will no longer be applied.
To keep both, set ext.args = '--quiet --kmers 8'.
You should always check a module's default configuration before overriding ext.args.
Takeaway
You know how to get help from an nf-core pipeline, set parameters and understand how they are validated, and customize configuration through config files.
What's next?
If you just want to run nf-core pipelines, you're done!
If you want to learn to develop your own pipelines according to nf-core standards, take a break, and move on to Part 2 when you're ready. You will learn to create your own nf-core compatible pipeline using the nf-core template-based tools.